Unlock Your Excavator's Full Potential: Everything You Need to Know About the Hydraulic Thumb and How to Weld and Install One - Bonovo
This article is your go-to guide for understanding the amazing excavator hydraulic thumb! We'll explore what a thumb is, why a hydraulic thumb is a game-changer for your excavator, and give you a clear look at how to install one. If you want to make your excavator do more, work smarter, and save time, then learning about the hydraulic thumb is a must. We'll make it easy to see how this attachment can transform your machine. For anyone in construction, demolition, landscaping, or even farming, understanding this tool can mean a big boost in how much work you get done.
1. What Exactly is an Excavator Thumb, and Why is it a Must-Have Attachment?
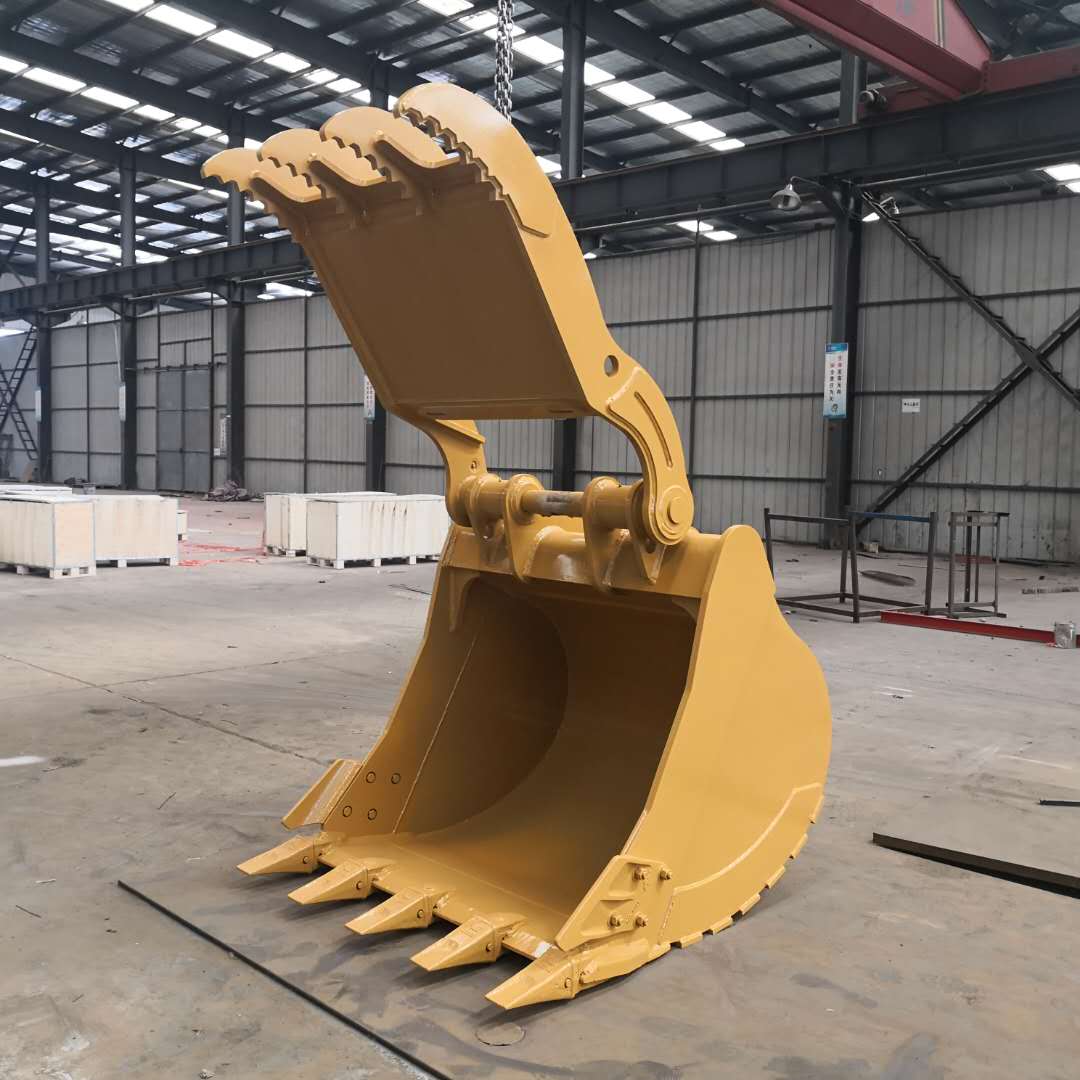
Imagine trying to pick up a pile of oddly shaped logs or big rocks with just one hand. It’s tough, right? Now, imagine you have a thumb to help you grip. That’s exactly what an excavator thumb does for an excavator! It's an attachment that works with the excavator bucket like a thumb works with your fingers. This simple-sounding tool is a real workhorse. The thumb allows your excavator to grab, hold, and move all sorts of materials that would be impossible or very clumsy to handle with just a bucket.
This thumb attachment is incredibly useful for so many jobs. Think about clearing land: you can easily pick up brush, trees, and stumps. In demolition, a thumb helps grab chunks of concrete or twisted metal. For landscapers, moving big rocks or logs into place becomes much simpler. The excavator thumb basically turns your excavator from just a digging machine into a super-versatile material handler. It’s like giving your excavator a giant, strong hand! Adding a thumb significantly increases the utility of the excavator, making it a more valuable piece of equipment on any job site. Many operators say that once they've used an excavator with a thumb, they can't imagine working without one.
At Bonovo, we've seen firsthand how an excavator thumb can transform a project. Our customers, like Mark Thompson from the USA, often tell us that adding a quality thumb to their excavator fleet has dramatically improved their efficiency. The ability to precisely clamp and control objects with the thumb reduces the need for manual labor and other specialized equipment, saving both time and money. This kind of versatility is why the excavator thumb is often considered a must-have attachment.
2. Mechanical vs. Hydraulic Thumb: Which is the Right Choice for My Excavator?
When you're looking at getting an excavator thumb, you'll mainly see two types: a mechanical thumb and a hydraulic thumb. Let's break them down so you can see which might be better for your excavator. A mechanical thumb, sometimes called a rigid thumb or stiff arm thumb, is the simpler of the two. It's usually pinned to the excavator arm in a few set positions. To change its position relative to the bucket, you often have to manually reposition it by moving a pin. It’s a basic, sturdy option and generally less expensive upfront. This type of thumb is good for jobs where you're handling similar-sized materials most of the time.
A hydraulic thumb, on the other hand, is powered by your excavator's hydraulic system. This means the operator can control the thumb's movement and gripping force right from the cab, using a joystick or a pedal. This gives you a lot more flexibility and precision. You can open and close the hydraulic thumb on the fly, adjusting your grip for different shapes and sizes of materials. This makes it much faster and easier to pick up all sorts of things, from small branches to big, awkward rocks. While a hydraulic thumb might cost a bit more to start with, the increased productivity and ease of use often make it a very worthwhile investment for your excavator.
So, which one is right for you? If you're on a tight budget and your excavator mostly handles uniform loads where you don't need to constantly adjust the thumb, a mechanical thumb could work. But for most people, especially those doing varied tasks like demolition, land clearing, or handling mixed debris, the hydraulic thumb is the clear winner. The ability to instantly adjust the thumb without leaving the cab saves a huge amount of time and makes the excavator far more efficient. As Allen from Bonovo, I can tell you that the demand for hydraulic thumb units is much higher because of this versatility. They simply let your excavator do more, faster.
3. What are the Big Benefits of Adding a Hydraulic Thumb to My Excavator?
Adding a hydraulic thumb to your excavator is like giving it a superpower! The benefits are huge and can really change how you work. First off, versatility skyrockets. Your excavator isn't just for digging anymore. With a hydraulic thumb, it can pick up almost anything: logs, rocks, pipes, demolition debris, brush – you name it. This means one machine can do the work of several, saving you from needing extra equipment like a separate grapple. This is a big deal for construction companies and demolition contractors.
Second, efficiency gets a massive boost. Imagine trying to load a truck with loose branches using only an excavator bucket. It's slow and messy. Now, picture using a hydraulic thumb to grab a whole bundle at once. Much faster, right? The operator can control the thumb from the cab, making quick adjustments to grab different materials securely. This saves a ton of time on every job. Less time means lower labor costs and faster project completion. For a business owner, this means more profit. We've seen productivity on clearing jobs increase by as much as 50% just by adding a good quality hydraulic thumb to an excavator.
Lastly, a hydraulic thumb improves safety and precision. Trying to balance awkward materials in a bucket alone can be risky. Things can fall out, potentially damaging property or, worse, injuring someone. A hydraulic thumb provides a secure grip, holding items firmly against the bucket. This controlled handling is also great for precision work, like placing rocks for a retaining wall or carefully sorting materials for recycling. The operator has much finer control, which reduces accidents and material wastage. Investing in a hydraulic thumb for your excavator isn't just about getting more work done; it's about working smarter and safer.
4. How Does a Hydraulic Thumb for an Excavator Actually Work its Magic?
The magic behind a hydraulic thumb for an excavator is all about using the power of hydraulics! Your excavator already has a powerful hydraulic system that moves the boom, arm, and bucket. A hydraulic thumb taps into this system. It has its own hydraulic cylinder, which is like a strong metal arm that can push and pull. This thumb cylinder is what makes the thumb itself move.
Here’s how it works: when you want to use the hydraulic thumb, you operate a control in the excavator's cab – usually a lever, button, or foot pedal. This control sends hydraulic fluid (a special oil) through hose lines to the thumb's hydraulic cylinder. If fluid is pumped into one side of the cylinder, it pushes a piston, which extends the cylinder and opens the thumb away from the bucket. If fluid is pumped into the other side, it retracts the cylinder, pulling the thumb closed towards the bucket, allowing it to clamp onto objects. The excavator’s hydraulics provide the force, and the thumb cylinder directs it to give the thumb its powerful grip.
The beauty of this system is the control it offers. The operator can finely adjust the position of the hydraulic thumb and the pressure it applies. Some systems even have a pressure relief valve to prevent too much force from being applied, protecting both the thumb and the excavator. This precise control means you can handle delicate items carefully or grip heavy, awkward objects with immense power. It's a really smart way to add a whole new level of skill to your excavator, all thanks to the clever use of its existing hydraulic unit.
5. Thinking About Getting a Hydraulic Thumb? What Key Factors Should I Consider Before I Install a Hydraulic Unit?
So, you're convinced a hydraulic thumb is a great idea for your excavator. That's smart! But before you rush out and buy one, or start to install a hydraulic system for it, there are some important things to think about. First and foremost is compatibility. Not every thumb fits every excavator. You need to make sure the thumb is the right size and strength for your specific excavator model. A thumb that’s too small won’t be effective, and one that's too big or heavy could strain your excavator's arm or even tip the machine. You'll need to know your excavator's weight, its arm width where the thumb will mount, and the pin size for the main pin if it's a pin-on style thumb.
Next, consider the type of work your excavator usually does. Are you doing heavy-duty demolition, or lighter land clearing? This will influence the style and strength of the hydraulic thumb you need. For example, a thumb with thicker, reinforced tines (the "fingers" of the thumb) will be better for handling rocks and concrete. Also, think about the number of tines on your thumb; more tines might offer a better grip on smaller, loose materials, while fewer, wider tines might be better for larger, bulkier items. At Bonovo, we help customers choose the right thumb make and design, ensuring the thumb to perfectly match their machine and bucket.
Finally, you need to check your excavator's existing hydraulics. Does it have auxiliary hydraulic lines already set up to power an attachment like a hydraulic thumb? If not, you'll need to get an aux hydraulic kit installed. This involves adding valve blocks, hose lines, and controls. You'll also want to know the hydraulic flow (gallons per minute or liters per minute) and pressure (PSI) your excavator can provide to ensure the hydraulic thumb operates correctly. Considering these factors upfront will save you a lot of headaches and ensure you get a thumb attachment that works perfectly with your excavator from day one. When ordering a thumb, especially if it's built to order, providing this information is key.
6. Getting Ready: How Do I Prepare My Excavator for a Hydraulic Thumb Attachment Installation?
Once you've chosen the perfect hydraulic thumb for your excavator, it's time to get your machine ready for the attachment installation. Proper preparation is key to a smooth and successful setup. The very first thing is safety. Make sure your excavator is parked on level, stable ground and turned off. Lower the boom and bucket to the ground. It's also a good idea to relieve any pressure in the hydraulic system – check your excavator's manual for how to do this safely. You'll be working with heavy parts, so wear appropriate safety gear like gloves, safety glasses, and steel-toed boots.
Next, clean the area on the excavator arm (often called the dipper stick or hoe stick) where the thumb will be mounted. If it's a weld-on thumb, the metal surface needs to be super clean – free of dirt, grease, paint, and rust – to ensure a strong weld. A grinder with a wire wheel or sanding disc works well for this. If your thumb is a pin-on type that uses existing bosses or requires new ones to be welded on, clean those areas too. A clean surface is crucial for a good mounting.
Finally, check your hydraulic connections. If your excavator already has auxiliary hydraulics plumbed to the end of the arm, locate the ports. Make sure you have the correct fitting types and sizes for the hydraulic thumb's hose lines. If you need to install a new hydraulic kit for the thumb, this is the stage where you'd typically start that process, following the kit manufacturer's instructions carefully to install the necessary valve, lines, and controls in the cab. Having everything prepped and ready makes the actual thumb attachment installation go much more smoothly. This preparation ensures that the hydraulic unit for the thumb can be connected without issues.
7. Step-by-Step: How to Weld and Install a Hydraulic Thumb on Your Excavator (The Basics)
Installing a hydraulic thumb on your excavator, especially a weld-on type, requires care and often some welding skill. If you're not a confident welder, it's best to get a professional to do this part. But here’s a general idea of the steps involved:
-
Position the Thumb Base Plate:
- With the excavator arm prepped, carefully lift the thumb's main base plate (the part that attaches to the arm) into position. This part can be heavy, so use appropriate lifting gear.
- The standard mounting position is crucial. The thumb needs to be aligned correctly with the excavator bucket so that when the thumb closes, its tines mesh properly with the bucket’s cutting edge or teeth, or curl inside the bucket. It’s a common mistake if the thumb doesn’t properly match the bucket arc, which often means that the thumb won't grab effectively.
- Temporarily tack weld the base plate in place once you're happy with the alignment. Double-check everything.
-
Weld the Base Plate Securely:
- This is the most critical part for a weld-on thumb. You need strong, deep penetrating welds all around the base plate to ensure the thumb can handle the forces it will encounter.
- Follow recommended welding procedures for the type of steel your excavator arm and thumb are made from. Pre-heating thick steel might be necessary.
- It's often best to weld in sections, alternating sides to prevent too much heat buildup in one area, which could warp the excavator arm.
-
Mount the Thumb Body and Hydraulic Cylinder:
- Once the base plate is securely welded and cooled, you can attach the main body of the thumb to it, usually with heavy-duty pins.
- Next, mount the hydraulic cylinder. One end of the cylinder attaches to a bracket on the excavator arm (this bracket might also need to be welded on, or it might be part of the thumb base plate). The other end of the cylinder attaches to the thumb itself. Ensure the main pin connections are greased and secured with any keepers or bolts.
-
Connect the Hydraulics:
- Connect the hydraulic hose lines from the excavator's auxiliary ports to the hydraulic cylinder on the thumb. Make sure the fitting connections are tight to prevent leaks. Route the hoses carefully to avoid pinching or rubbing when the excavator arm and thumb move.
- If your excavator didn't have auxiliary hydraulics, you'd complete the plumbing of the new valve and lines now.
-
Test and Adjust:
- Slowly and carefully operate the hydraulic thumb from the cab. Check for smooth movement, full range of motion, and any leaks.
- Extend and retract the thumb fully, and also test its interaction with the excavator bucket. Make sure the tines on your thumb curl correctly towards or into the bucket.
Remember, this is a basic overview. Always follow the specific instructions from your thumb manufacturer. Proper installation of your excavator thumb is key to its performance and longevity.
8. Are All Excavator Thumbs the Same? Exploring Different Thumb Designs and Their Uses.
No, definitely not! There are many thumb variations out there, and understanding these different thumb designs can help you pick the best one for your excavator and the jobs you do. While we've talked about mechanical versus hydraulic thumb types, even within those categories, designs can vary. For example, some thumb units are designed to be lighter for smaller excavators, while others are heavily reinforced for extreme-duty work.
One important design difference is the progressive link thumb. A progressive link thumb (often a type of hydraulic thumb) uses a special linkage system between the hydraulic cylinder and the thumb itself. This linkage provides a wider range of motion – often up to 180 degrees or more – and more consistent force throughout the thumb's entire curl. This means the thumb can follow the bucket's curve more closely, allowing it to pick up objects very close to the excavator or reach further out. These are fantastic for jobs requiring a lot of dexterity with your excavator thumb.
Other design aspects include the shape and number of tines. Some thumb models have fewer, very thick, and strong tines, ideal for gripping large, solid objects like rocks or concrete slabs. Other thumb designs feature more, narrower tines that are better for handling loose materials like brush, scrap, or even for a thumb and rake combination effect. The material used to make the thumb is also a big factor. High-strength, wear-resistant steel (like AR400 or AR500) is common for quality thumb units because it can withstand the tough conditions these attachments face. At Bonovo, we understand that different jobs need different tools, which is why we offer all thumb variations, including custom designs, to make sure you get the perfect excavator thumb for your specific needs.
9. How Can I Make Sure My New Excavator Thumb and Bucket are a Perfect Match?
Getting your new excavator thumb and bucket to work together like a dream team is super important. If they don't match up well, your excavator won't be as efficient, and you could even damage the attachment or the machine. The goal is for the thumb tines to curl in smoothly towards the bucket, ideally meshing with or just inside the bucket’s cutting edge or teeth when fully closed. This creates a secure clamp for holding materials.
The first step is to consider your bucket type when you're ordering a thumb. Is it a standard digging bucket, a wider cleanup bucket, or a specialized bucket like a rock bucket? The width and profile of your bucket will affect how the thumb needs to be sized and positioned. For example, a thumb for a narrow trenching bucket will be different from a thumb designed for a wide grading bucket. You need a thumb to perfectly match your specific machine and bucket. If the thumb doesn’t properly match the bucket profile, it often means that the thumb will leave gaps, allowing material to fall out, or it might not be able to close far enough to grip smaller items effectively.
When installing, especially a weld-on thumb, precise positioning is key. Before you do the final weld, temporarily position the thumb and cycle it through its range of motion (if possible, or at least visualize it) with the bucket attached. Check how the thumb tines will interact with the bucket at different points of the curl. You want to ensure that the thumb doesn't hit the bucket teeth or sides awkwardly, and that it provides the best possible grip. Many manufacturers, including us at Bonovo, can provide guidance on the ideal standard mounting position for a thumb relative to common bucket types for your excavator model. Taking the time to get this match right will pay off big time in performance.
10. What are Common Pitfalls When Installing or Using an Excavator Hydraulic Thumb?
Even with the best intentions, folks can run into a few common problems when installing or using an excavator hydraulic thumb. Knowing these pitfalls can help you avoid them! One of the biggest issues during installation is incorrect positioning of the thumb. If the thumb is welded too far forward or too far back on the excavator arm, it won't mesh properly with the bucket. This means that the thumb doesn’t close effectively, or it might restrict the bucket's movement. Always double-check alignment before that final weld.
Another common problem is with the hydraulics. This could be anything from using the wrong size hose or fitting, leading to leaks or restricted flow, to not having enough hydraulic pressure (PSI) from the excavator to power the thumb cylinder effectively. Sometimes, an improperly installed or adjusted valve can cause jerky movements or a weak grip from the hydraulic thumb. It's also crucial to ensure any new hydraulic lines are properly routed and secured to prevent them from getting pinched or snagged during operation, which could lead to a dangerous hydraulic fluid spill.
When using the hydraulic thumb, a frequent mistake is trying to lift loads that are too heavy for the thumb or even the excavator itself. While a good thumb is strong, it has its limits. Overloading can damage the thumb cylinder, bend the tines, or even stress the excavator's arm. Another operational error is using the thumb as a primary digging tool like a ripper for very hard ground, or trying to pry out large, embedded objects like big stump pullers etc. – that's not what it's designed for. A thumb is for grabbing and handling, not extreme prying. Proper operator training on the capabilities and limitations of the excavator thumb is essential for longevity and safety.
11. Keeping Your Hydraulic Thumb Strong: Safety and Maintenance Tips for Your Excavator Attachment.
Once your hydraulic thumb is installed and working great on your excavator, you'll want to keep it that way for a long time. Good maintenance and safe operation are key. Just like any hardworking attachment, your excavator thumb needs a little TLC. Regular checks can prevent small problems from turning into big, expensive ones.
Here are some top tips for keeping your hydraulic thumb in fighting shape:
- Daily Checks: Before starting work, give your thumb a quick once-over.
- Look for any loose bolts or pins, especially on the mounting points and the hydraulic cylinder connections.
- Inspect hydraulic hoses for any signs of wear, cracks, or leaks. A leaking hose can lose pressure and make a mess.
- Check the tines for any cracks or bends.
- Grease is Good: The pivot points on your thumb (where it hinges) and the main pin connections for the hydraulic cylinder need regular greasing. This keeps them moving smoothly and prevents wear. Check your thumb manufacturer's guide for grease points and frequency.
- Hydraulic System Care: Keep an eye on your excavator's hydraulic fluid levels and cleanliness. Dirty or low fluid can affect the performance of your hydraulic thumb and other hydraulics.
- Watch for Wear: The tines on your thumb and the areas where it contacts the bucket will wear over time, especially if you're handling abrasive materials. Some thumb designs have replaceable wear parts.
- Safe Operation:
- Always operate the excavator and thumb from the cab.
- Be aware of your surroundings and make sure no one is too close when you're moving materials with the thumb.
- Don't overload the thumb. Know its lifting capacity.
- When parking the excavator, fully retract or store the thumb properly against the arm or bucket to prevent accidental damage.
- If you're using your excavator with a High-quality mechanical quick coupler from BONOVO, ensure the thumb doesn't interfere with the quick coupler mechanism during operation or when changing attachments.
A little bit of care for your excavator thumb goes a long way in ensuring it's always ready to dig in and get the job done safely and efficiently.
12. Why Partner with a Specialist Factory for Your Excavator Thumb Needs?
When you're looking to buy an excavator thumb, especially a hydraulic thumb, you have choices. You could go to a general dealer, or you could partner directly with a specialist factory like Bonovo. As Allen from Bonovo, I can tell you there are real advantages to working with people who live and breathe these attachments every day. A specialist factory has deep knowledge about different thumb designs, materials, and how they perform with various excavator models and bucket types, like a Bonovo original design customizable general-duty excavator bucket.
One big benefit is customization and precision. We understand that a thumb to perfectly match your machine and bucket is crucial. A factory can often offer more options, like different number of tines, specific grades of steel, or adjustments to the pin size or mounting style. We can even design and build a thumb that's built to order for unique applications. This level of tailoring ensures you get an excavator thumb that’s optimized for your work, whether it's tough demolition or delicate land clearing. This is especially true for equipment like a Factory price brand new land clearing rakes stick rake for 1-100 ton excavator where specific design is key.
Quality control and expertise are also paramount. At Bonovo, because we focus on manufacturing, we have strict quality checks at every stage, from the raw steel to the final weld and hydraulic cylinder testing. We use high-quality materials designed for durability. And when you talk to us, you're talking to people who understand the technical details. We can discuss your excavator's hydraulic flow, PSI requirements, and the best thumb make for your needs. While the usual lead time for a custom or built to order thumb might be a few weeks to manufacture, the result is an attachment you can rely on. For parts like Excavator Bucket Pins 30-140 mm, having a direct factory connection ensures you get precisely what's needed. We aim to avoid situations where a thumb doesn’t properly match, which often means that the thumb won't deliver the expected performance. We offer all thumb variations because we know that the demands vary widely between thumb setups.
Key Takeaways for Your Excavator Thumb Journey:
- Versatility is King: An excavator thumb, especially a hydraulic thumb, dramatically increases what your excavator can do, turning it into a multi-purpose material handler.
- Hydraulic is Often Better: For most applications, the control and efficiency of a hydraulic thumb make it superior to a mechanical thumb.
- Match it Right: Ensure the thumb is compatible with your excavator model and bucket type for optimal performance. Proper sizing and the right pin size are crucial.
- Installation Matters: Correct positioning and secure welding (if applicable) are vital for a thumb attachment's longevity and safety.
- Know Your Designs: Understand that there are many thumb variations, like the progressive link thumb, and choose one that suits your specific tasks.
- Safety and Maintenance: Regular checks, proper greasing, and safe operating practices will keep your excavator thumb working hard for years.
- Partner Wisely: Consider working with a specialist manufacturer for expertise, quality, and customization options for your excavator thumb. A good thumb is an investment in your excavator's productivity!


