Tips & Tricks: How to replace pins and bushes in a digger arm? - Bonovo
As small excavators age, constant use means that often worn components such as pins and bushings begin to wear away. These are replaceable wearables, and the following article gives some tips and tricks on the challenges of replacing them.
How to replace excavator bucket pins
As the name suggests, the bucket nail on the excavator is used to fix the bucket on the excavator. For this reason, we put together a separate resource that can be found here: How do I change the bucket pin on my excavator
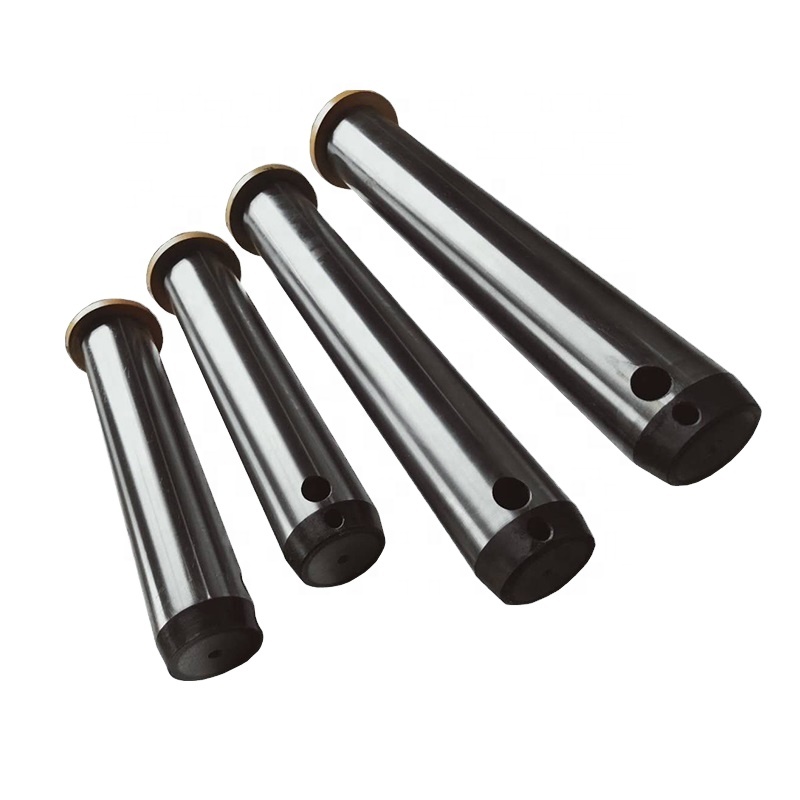
How to replace digger link pins / boom pins / ram pins
As a start, all pins will be fixed to their positions, but this is different from machine to machine. Takeuchi excavators tend to have a large nut and washer at the end of the pin, while Kubota and JCB excavators usually drill a hole at the end of the pin and bolt it down. Other machines have a thread at the end of the pin that can be screwed in. No matter what type of excavator you have, this needs to be removed and then the pin should be able to be removed.
With the seven-star pin machine, removing them is usually quite easy, but as you move further into the bucket arm, make sure the boom through the girder needs to start before making sure the arm is very supportive as you start putting the pin.
Normally, if you are removing the boom to replace the main pillar bush, you will need a sling from an overhead crane or forklift to assist in removing it and putting it back in place.
Once the pins have been removed, it's time to start trimming the bushes. We always recommend replacing pins and sleeves together, as both wear and tear together over time, so replacing just one part can often lead to bigger problems.
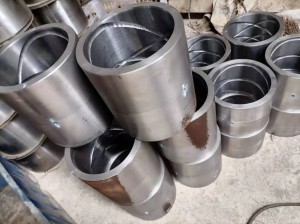
How to remove digger bushes
When replacing shrubs on the excavator arm, the first challenge is to remove the old shrubs.
Usually, if you remove them, they're already worn out, so whatever damage you're doing to the old brush, you want to keep the excavator arm intact at all costs.
We've collected some tips and tricks from factory installers to help you!
1) a brute force! A good old hammer and stick is usually enough for a small excavator, especially if the bush is quite worn down. Be sure to use a rod larger than the inner diameter of the bushing but smaller than the outer diameter of the bushing. If you do this often, some engineers will find it convenient to create a step tool for bearing bushes of various sizes.
2) Weld a stick short to bush (even a big spot weld can work), this allows you to put a stick through bush and knock it out
3) Weld around the radius of the bush - this really works for the larger bush and the idea is that as the weld cools it shrinks the bush enough to allow it to be easily removed
4) Cut bushings - Using an oxy-acetylene torch or similar tool, a groove can be cut in the inner wall of the bushings so that the bushings can contract and be easily removed. As a warning, it is very easy to go too far, cut into the arm of the digger and cause expensive damage!
5) Hydraulic press -- probably the safest choice, but we put it at the bottom of the list because not everyone has the necessary equipment.
How to replace digger bushes
After removing the old bush from your excavator arm, the next step is to install the new bush.
Again, depending on what you have on hand, you'll need different levels of equipment for this task.
1) Nail them in! Sometimes it... But be very careful - the bearing bushes of excavators are usually made of induction hardened steel, which, while very hard and wear-resistant, can easily fall off when you hammer them.
2) Heating - this is very effective if you can get the heat source close enough to where you are replacing the bushing. Essentially, you need to heat the sleeve case, causing it to expand and allowing you to push the sleeve by hand, allowing it to cool again until it tightens. Just look at the paint on the arm of the excavator, as the heat can do quite a bit of damage to it.
3) Cooling bush - effectively works in reverse of the above method, but instead of heating the shell (expanding it), you cool the bush and shrink it. Typically, trained engineers will use liquid nitrogen at -195°C, which requires very specialized equipment and training to use. If it's a small digger, it's a good idea to put them in the fridge for 24 hours before you try them on, to make them cool enough to make the job easier.
4) Hydraulic press -- again, this requires special equipment to do, but it is a safe and effective way to install bearing bushes. It is sometimes used in combination with methods 2 or 3, especially on larger excavators.
How to replace bushes in a Bucket Link / H Link
Replacing a shrub in a bucket link (sometimes called an H link) is very similar to the method above. One area you have to be careful about is the open end of the bucket link. You need to be very careful not to bend this end when pressing the bush on this end.
Other pitfalls to watch out for Worn bush housing
If you make an old bush too old, the bush can start to spin around in the house and wear it oval, in which case it is difficult to repair.
The only correct way to repair it is to drill the arm, which requires specialist equipment to weld the arm together and then drill it out.
If you need an emergency solution to get you through, we've seen people add a few points around the welded outer edge of the bush and then grind them back to rinse. Normally this would be enough to hold the bush in place and stop it spinning, but it can make life difficult the next time you need to replace them. 
As always, we love getting feedback from customers and experts in the field, and would love to hear any suggestions and tips you have over the years.


